Dragon Quest 3 Remake: Baramos's Lair Guide
Quick Links
After collecting the Six Orbs and hatching Ramia the Everbird, you'll be ready to embark on your journey to Baramos's Lair in Dragon Quest 3 Remake. This dungeon serves as the ultimate test of your skills, culminating your adventures thus far before you delve into the dark world beneath the main map. In this guide, we'll walk you through how to find and conquer Baramos's Lair in Dragon Quest III HD-2D Remake.
Baramos's Lair is the stronghold of the Archfiend Baramos, the main antagonist in the first half of Dragon Quest 3 Remake. You'll need to unlock Ramia the Everbird to access this dungeon, as it's the only way to reach the secluded valley where the lair is situated. Ensure your Hero is at least level 20 before tackling this challenge. Baramos's Lair contains numerous essential items, which we'll detail in each section.
How to Reach Baramos's Lair in Dragon Quest 3 Remake
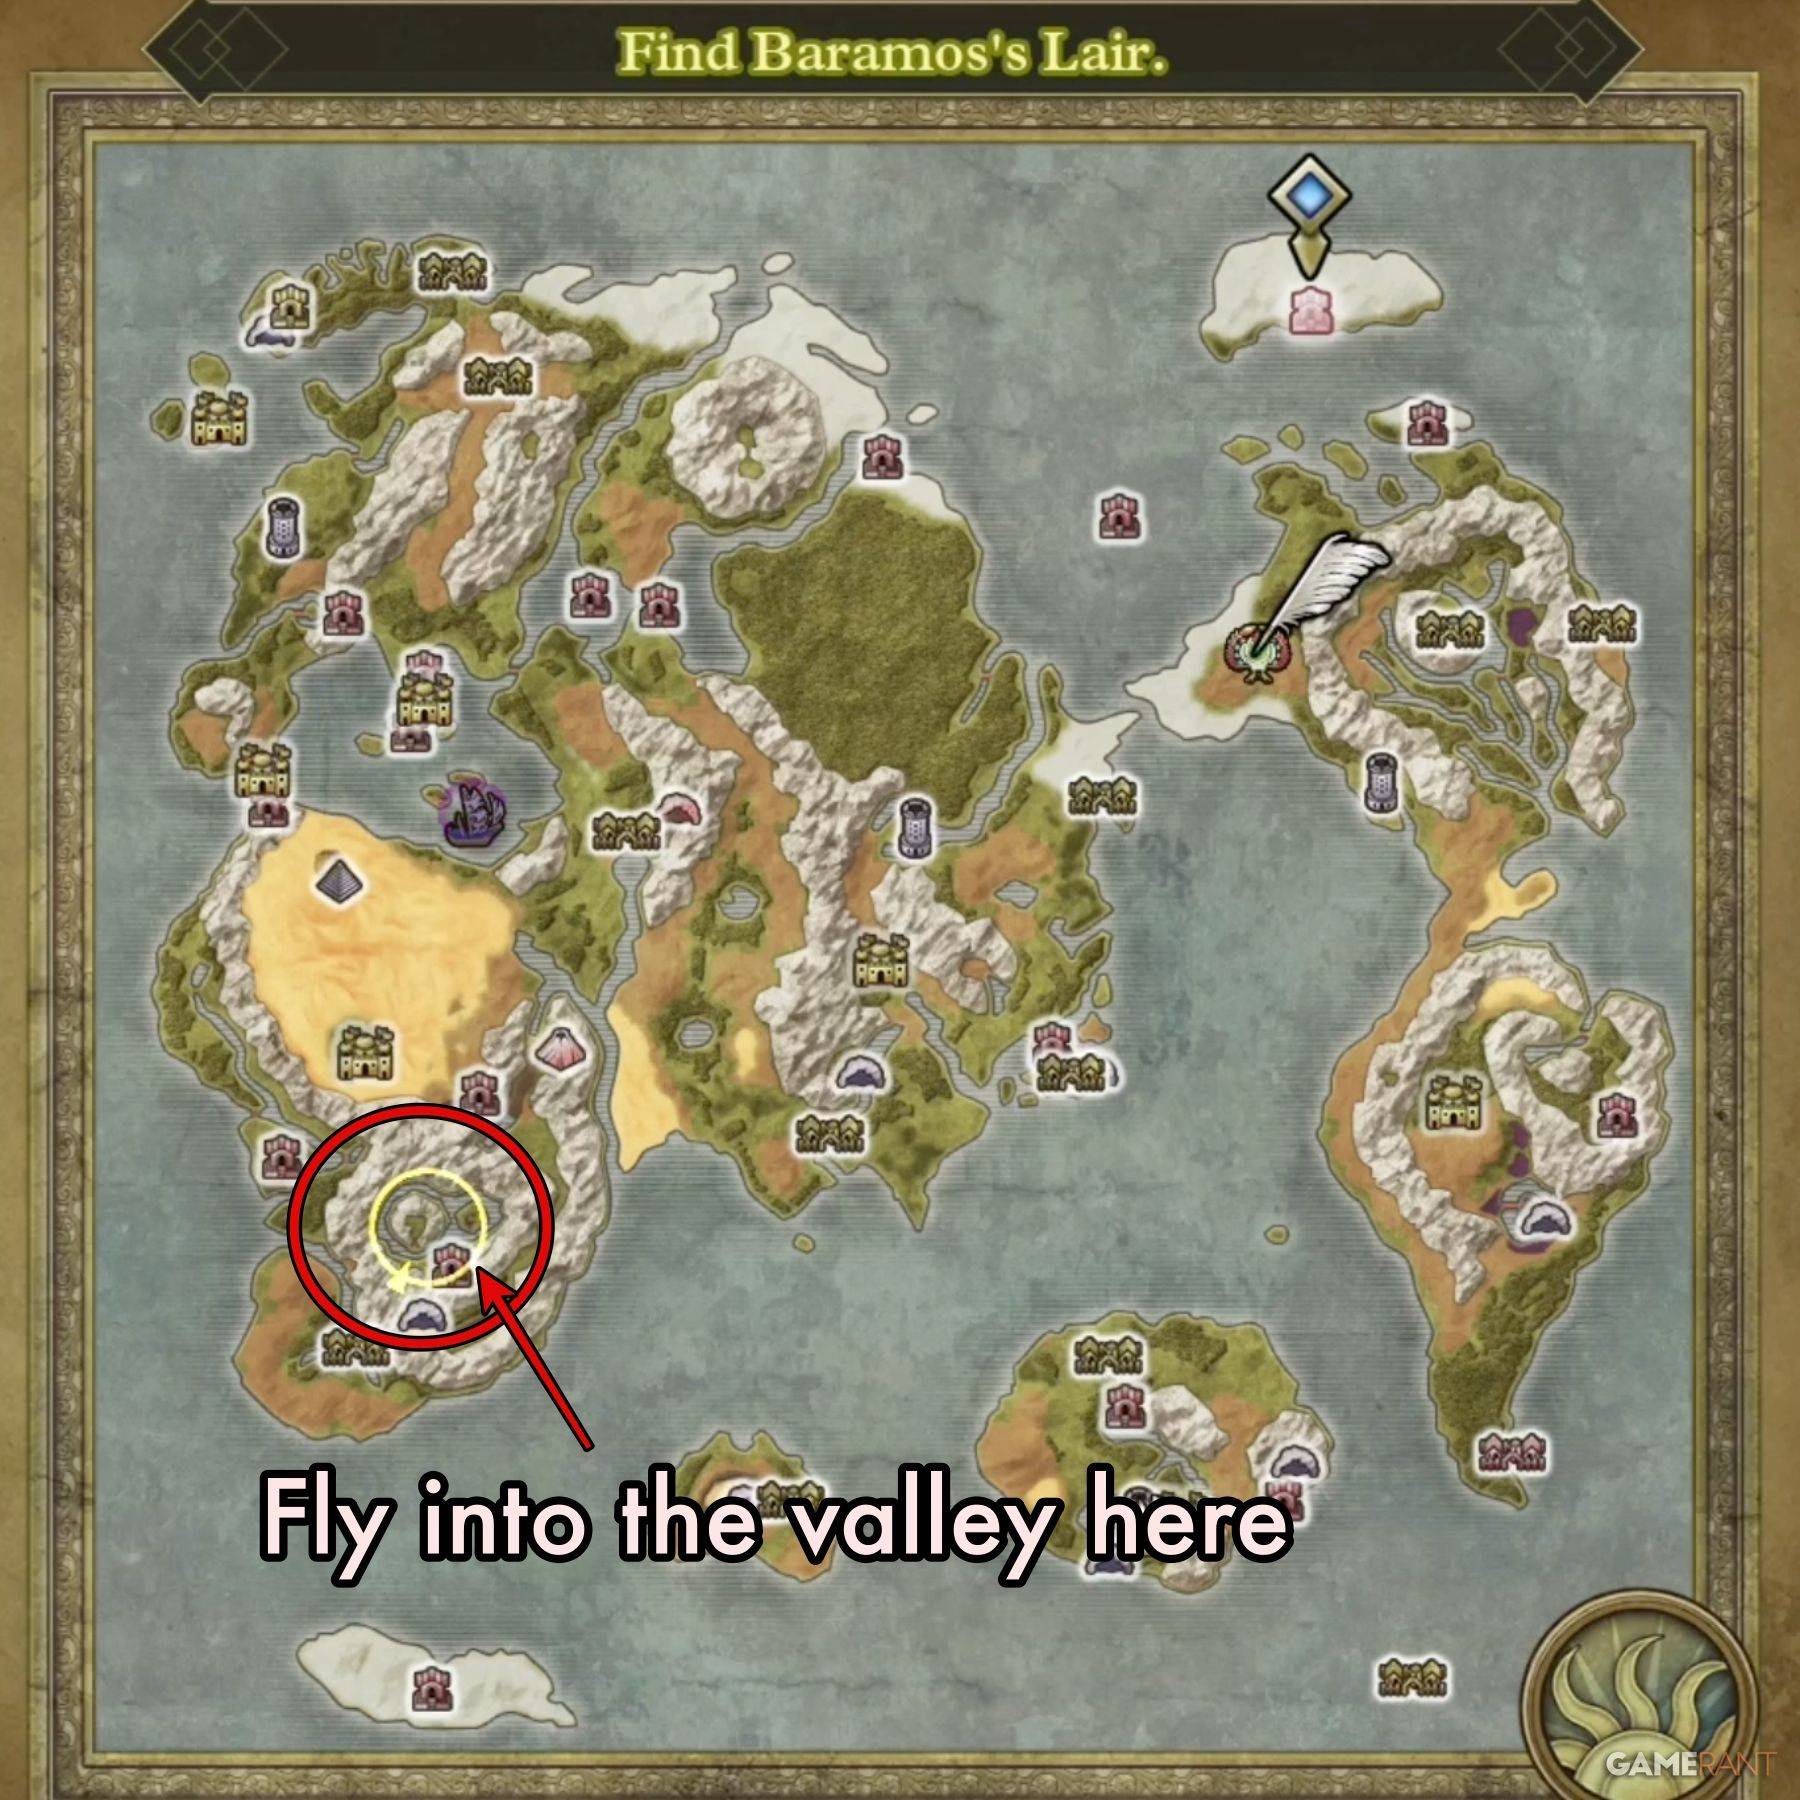 Once you've completed the Maw of the Necrogond and obtained the Silver Orb, you'll unlock Ramia the Everbird. To reach Baramos's Lair, you can fly directly from the Shrine of the Everbird or from the Necrogond Shrine.
Just north of the Necrogond Shrine, you'll spot an island surrounded by mountains. This is where Baramos's Lair lies. Fly Ramia to the location and land outside the dungeon entrance. Head north to enter the dungeon area as if it were a town.
Baramos's Lair Walkthrough – Dragon Quest 3 Remake
Upon entering Baramos's Lair in DQ3 Remake, you'll notice it's different from most major dungeons. Instead of a straightforward vertical progression, you'll navigate through a mix of indoor and outdoor areas to reach the Archfiend Baramos.
The first section you'll encounter is Baramos's Lair – Surroundings, the main outdoor hub. You'll return here whenever you exit any structures or passageways. We'll outline the main path to the boss fight chamber and then detail the treasure locations on each floor.
How to Reach Baramos Boss Fight – Main Path:
- Step 1: From the starting point, bypass the main door leading to the 'Entrance' area. Instead, head around the eastern side of the castle towards the pool of water in the northeast corner of the map.
- Step 2: Upon reaching the stairs by the pool, turn left and head west to another set of stairs. Ascend these stairs and enter the door on your right.
- Step 3: You'll find yourself in the Eastern Tower. Climb to the top and exit.
- Step 4: You'll now be on the castle's roof, visible on the Surroundings map. Head southwest across the roof, then descend the stairs to the lower level. Continue west, navigate through the gaps in the double wall on the northwest roof, and use the stairs in the northwest corner.
- Step 5: The northwest stairs lead to the Central Tower. Head to the southwest corner stairs, using the Safe Passage spell to cross the electrified floor panels. Descend to B1 Passageway A.
- Step 6: In B1 Passageway A, you can go south or east. Head east and proceed to the stairs on the far eastern side.
- Step 7: Enter the South-East Tower from the southeastern part of its map. Head northeast to the only available stairs and ascend to the roof. Move west briefly before descending another set of stairs to the western section of the South-East Tower map. Cross the grass northwest and enter the only available door.
- Step 8: This door leads to the northeast corner of the Central Tower. Exit through the only available door.
- Step 9: You'll now be in B1 Passageway B, a long corridor with a single entrance and exit. Head north to the stairs.
- Step 10: Enter the Throne Room and proceed to the southern exit, avoiding the floor panels.
- Step 11: Exiting the Throne Room brings you back to the Surroundings map. The Throne Room is the northwest structure. Head east to the structure on the island in the northeast corner of the lake. This is Baramos's Den, where the boss fight occurs.
All Treasure in Baramos's Lair – Dragon Quest 3 Remake
All Surroundings Treasure:
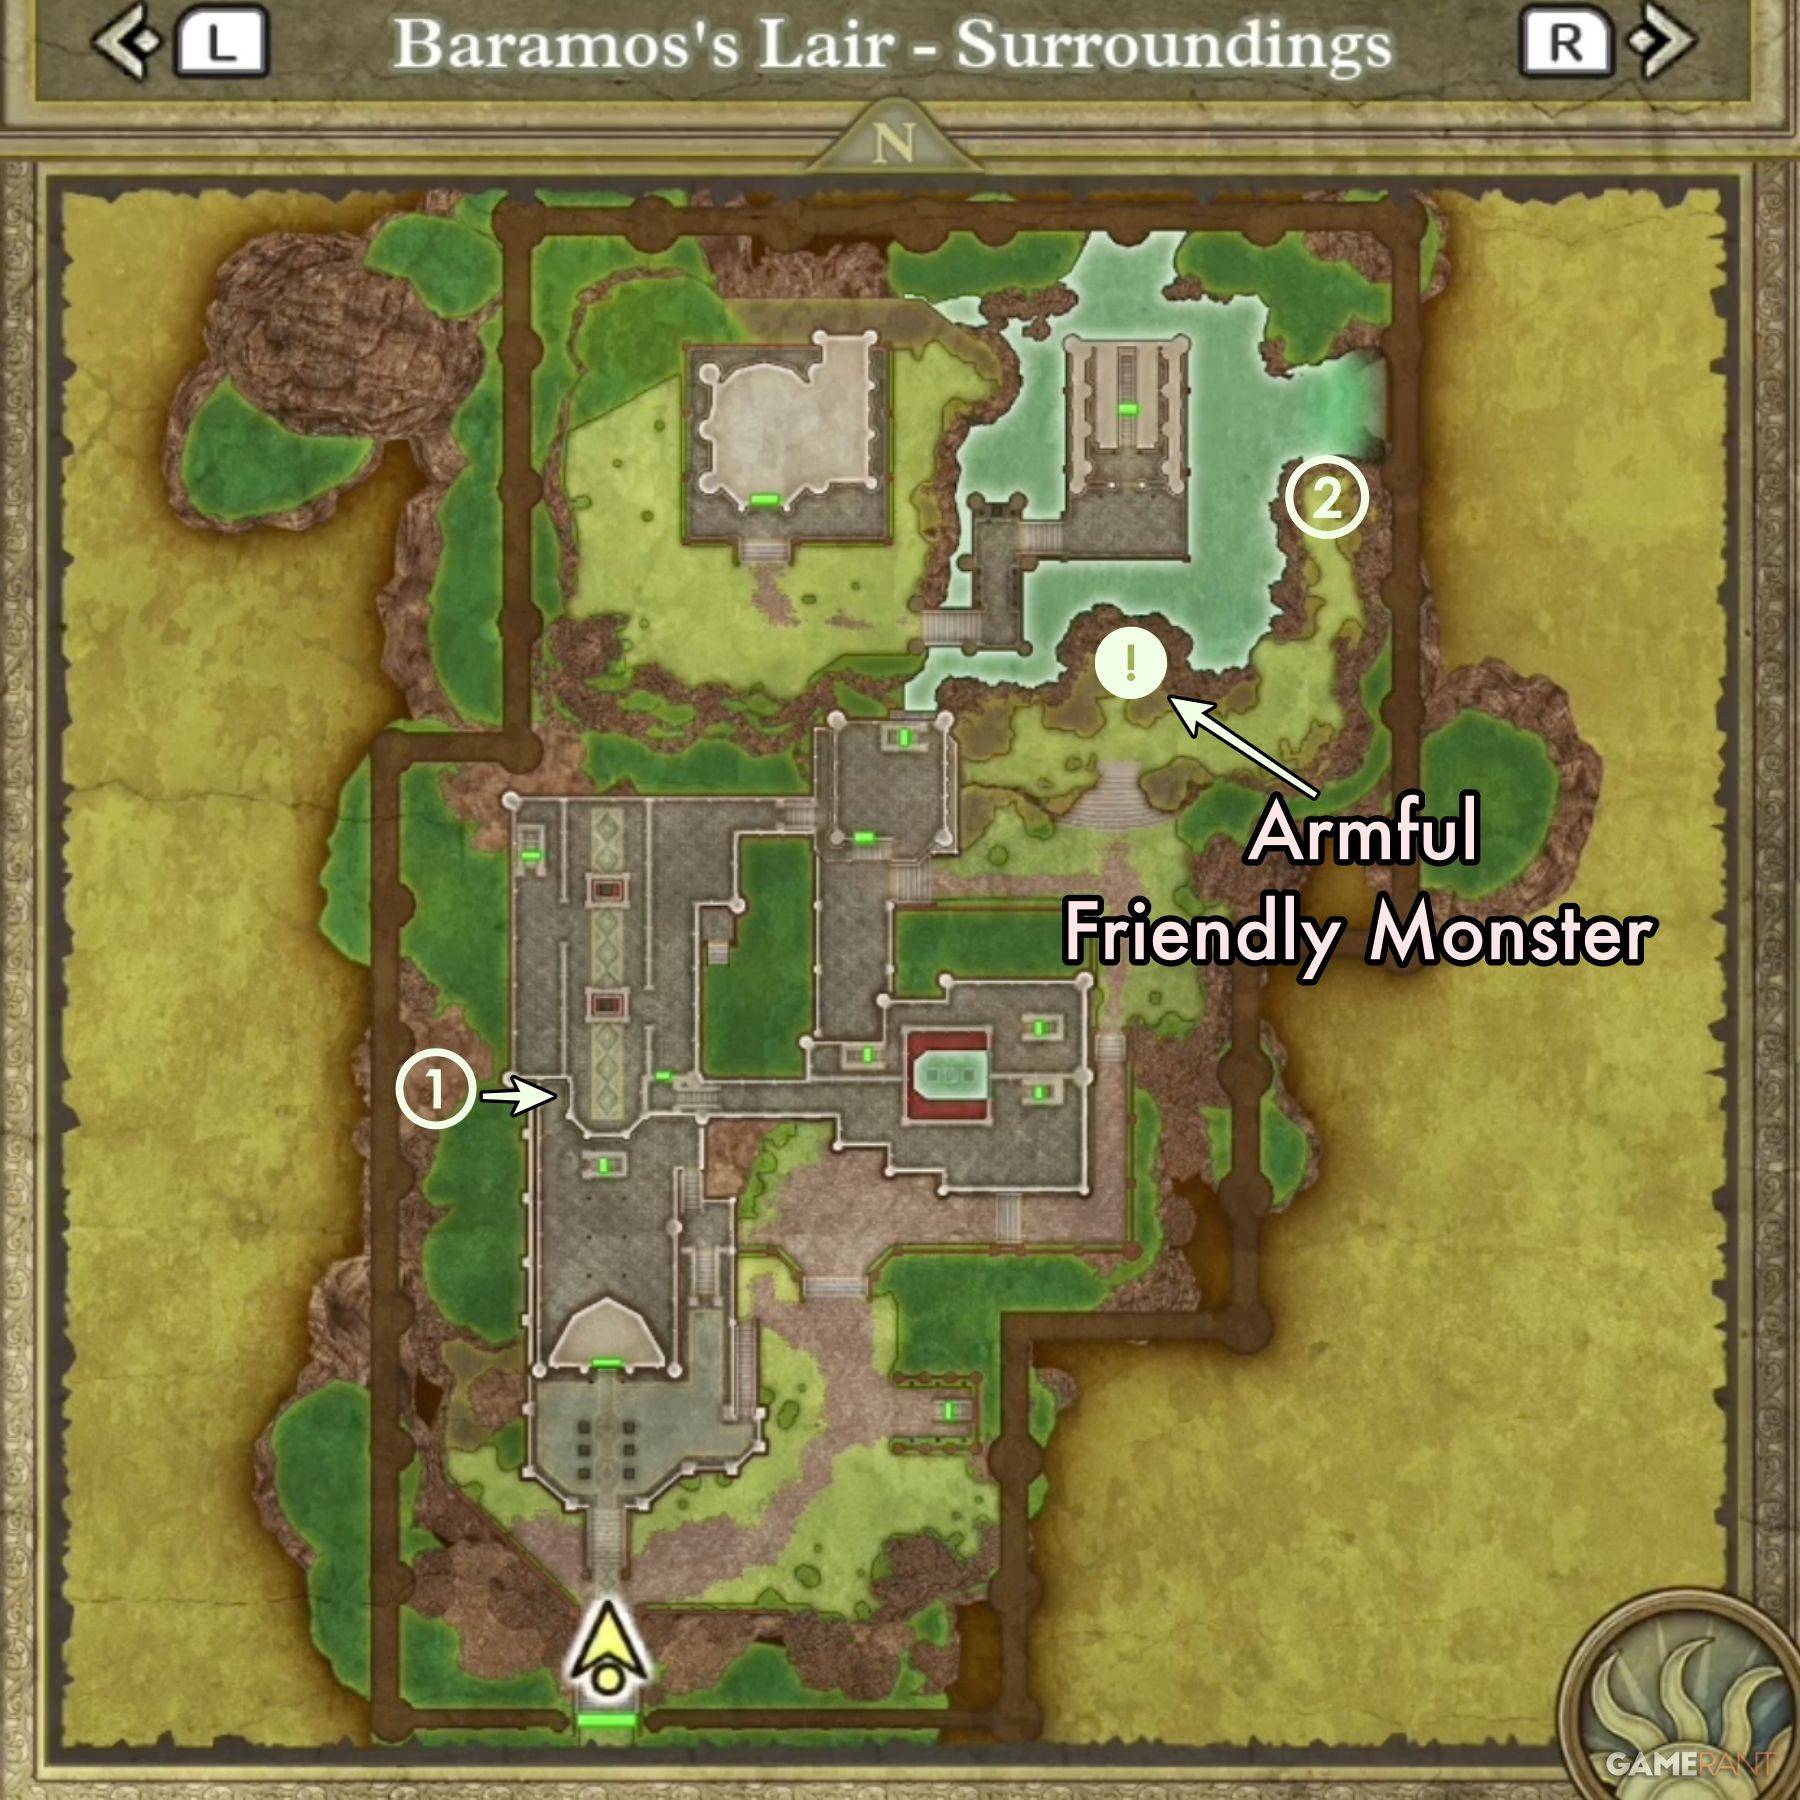 - Treasure 1 (Chest): Prayer Ring
- Treasure 2 (Buried): Flowing Dress
The Surroundings map features one of Dragon Quest III Remake's Friendly Monsters, an Armful named Armstrong.
All Central Tower Treasure:
 - Treasure 1: Mimic (enemy)
- Treasure 2: Dragon Mail
All South-East Tower Treasure:
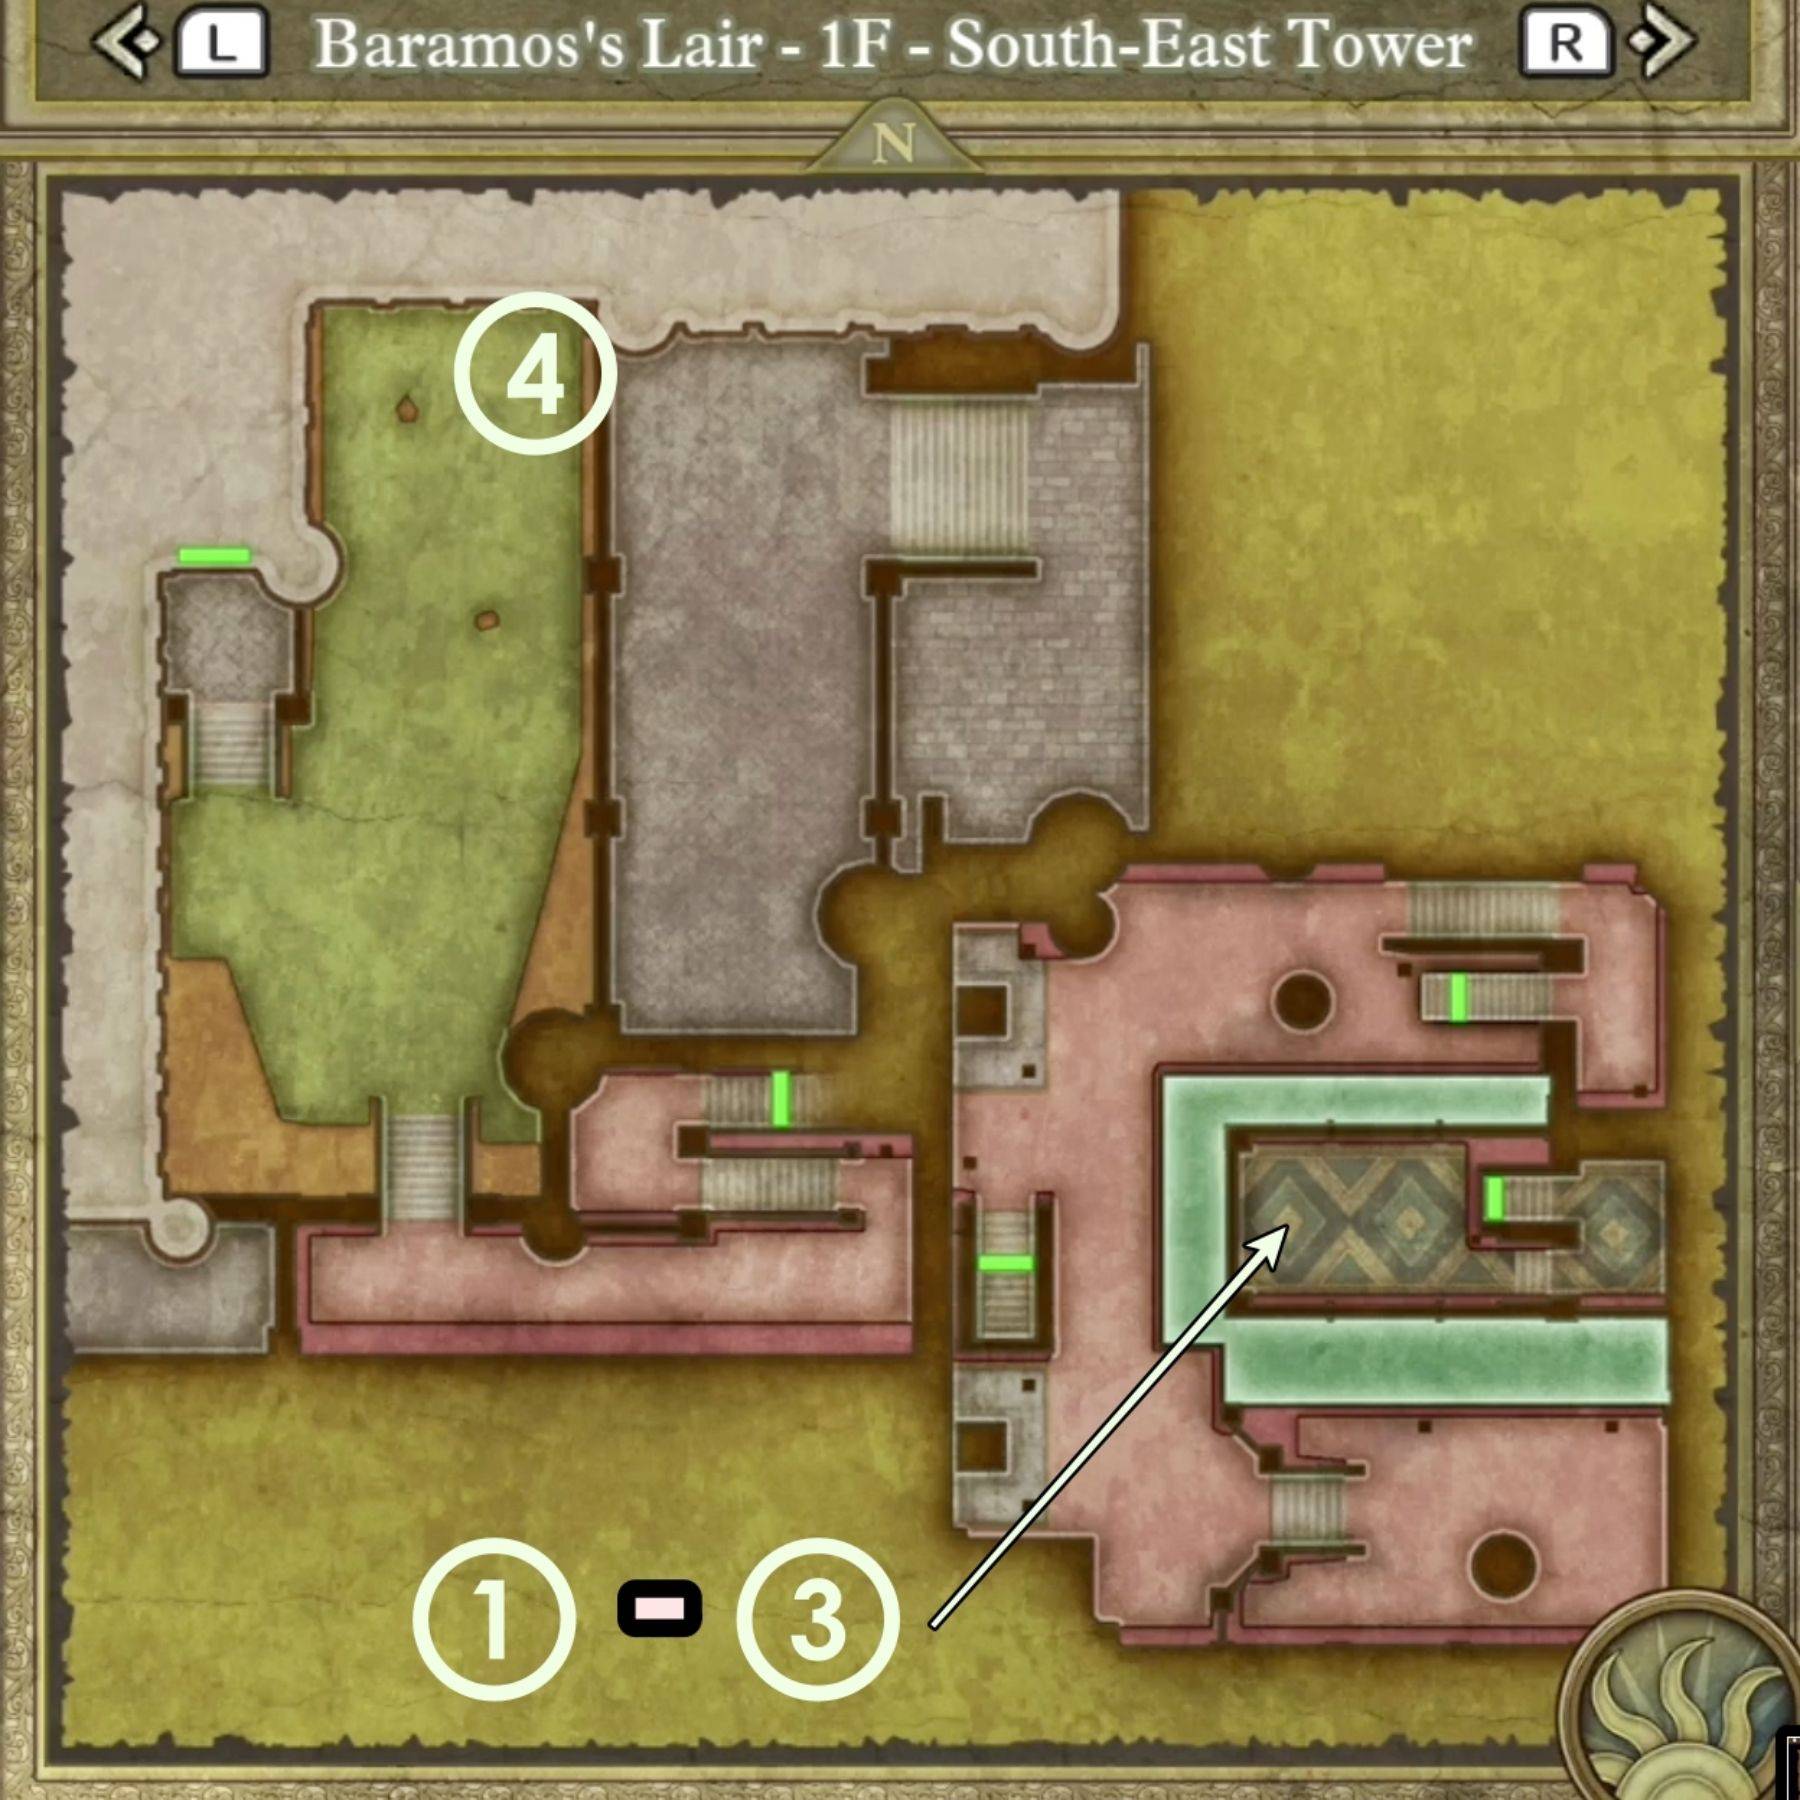 - Treasure 1 (Chest): Hapless Helm
- Treasure 2 (Chest): Sage's Elixir
- Treasure 3 (Chest): Headsman's Axe
- Treasure 4 (Chest): Zombiesbane
To reach the three Treasure Chests in the southeastern section of the South-East Tower map, navigate to the Central Tower (refer to the main path steps). Exit through the southeast door, head east across the roof, and descend the stairs to the platform with the chests.
All B1 Passageway Treasure:
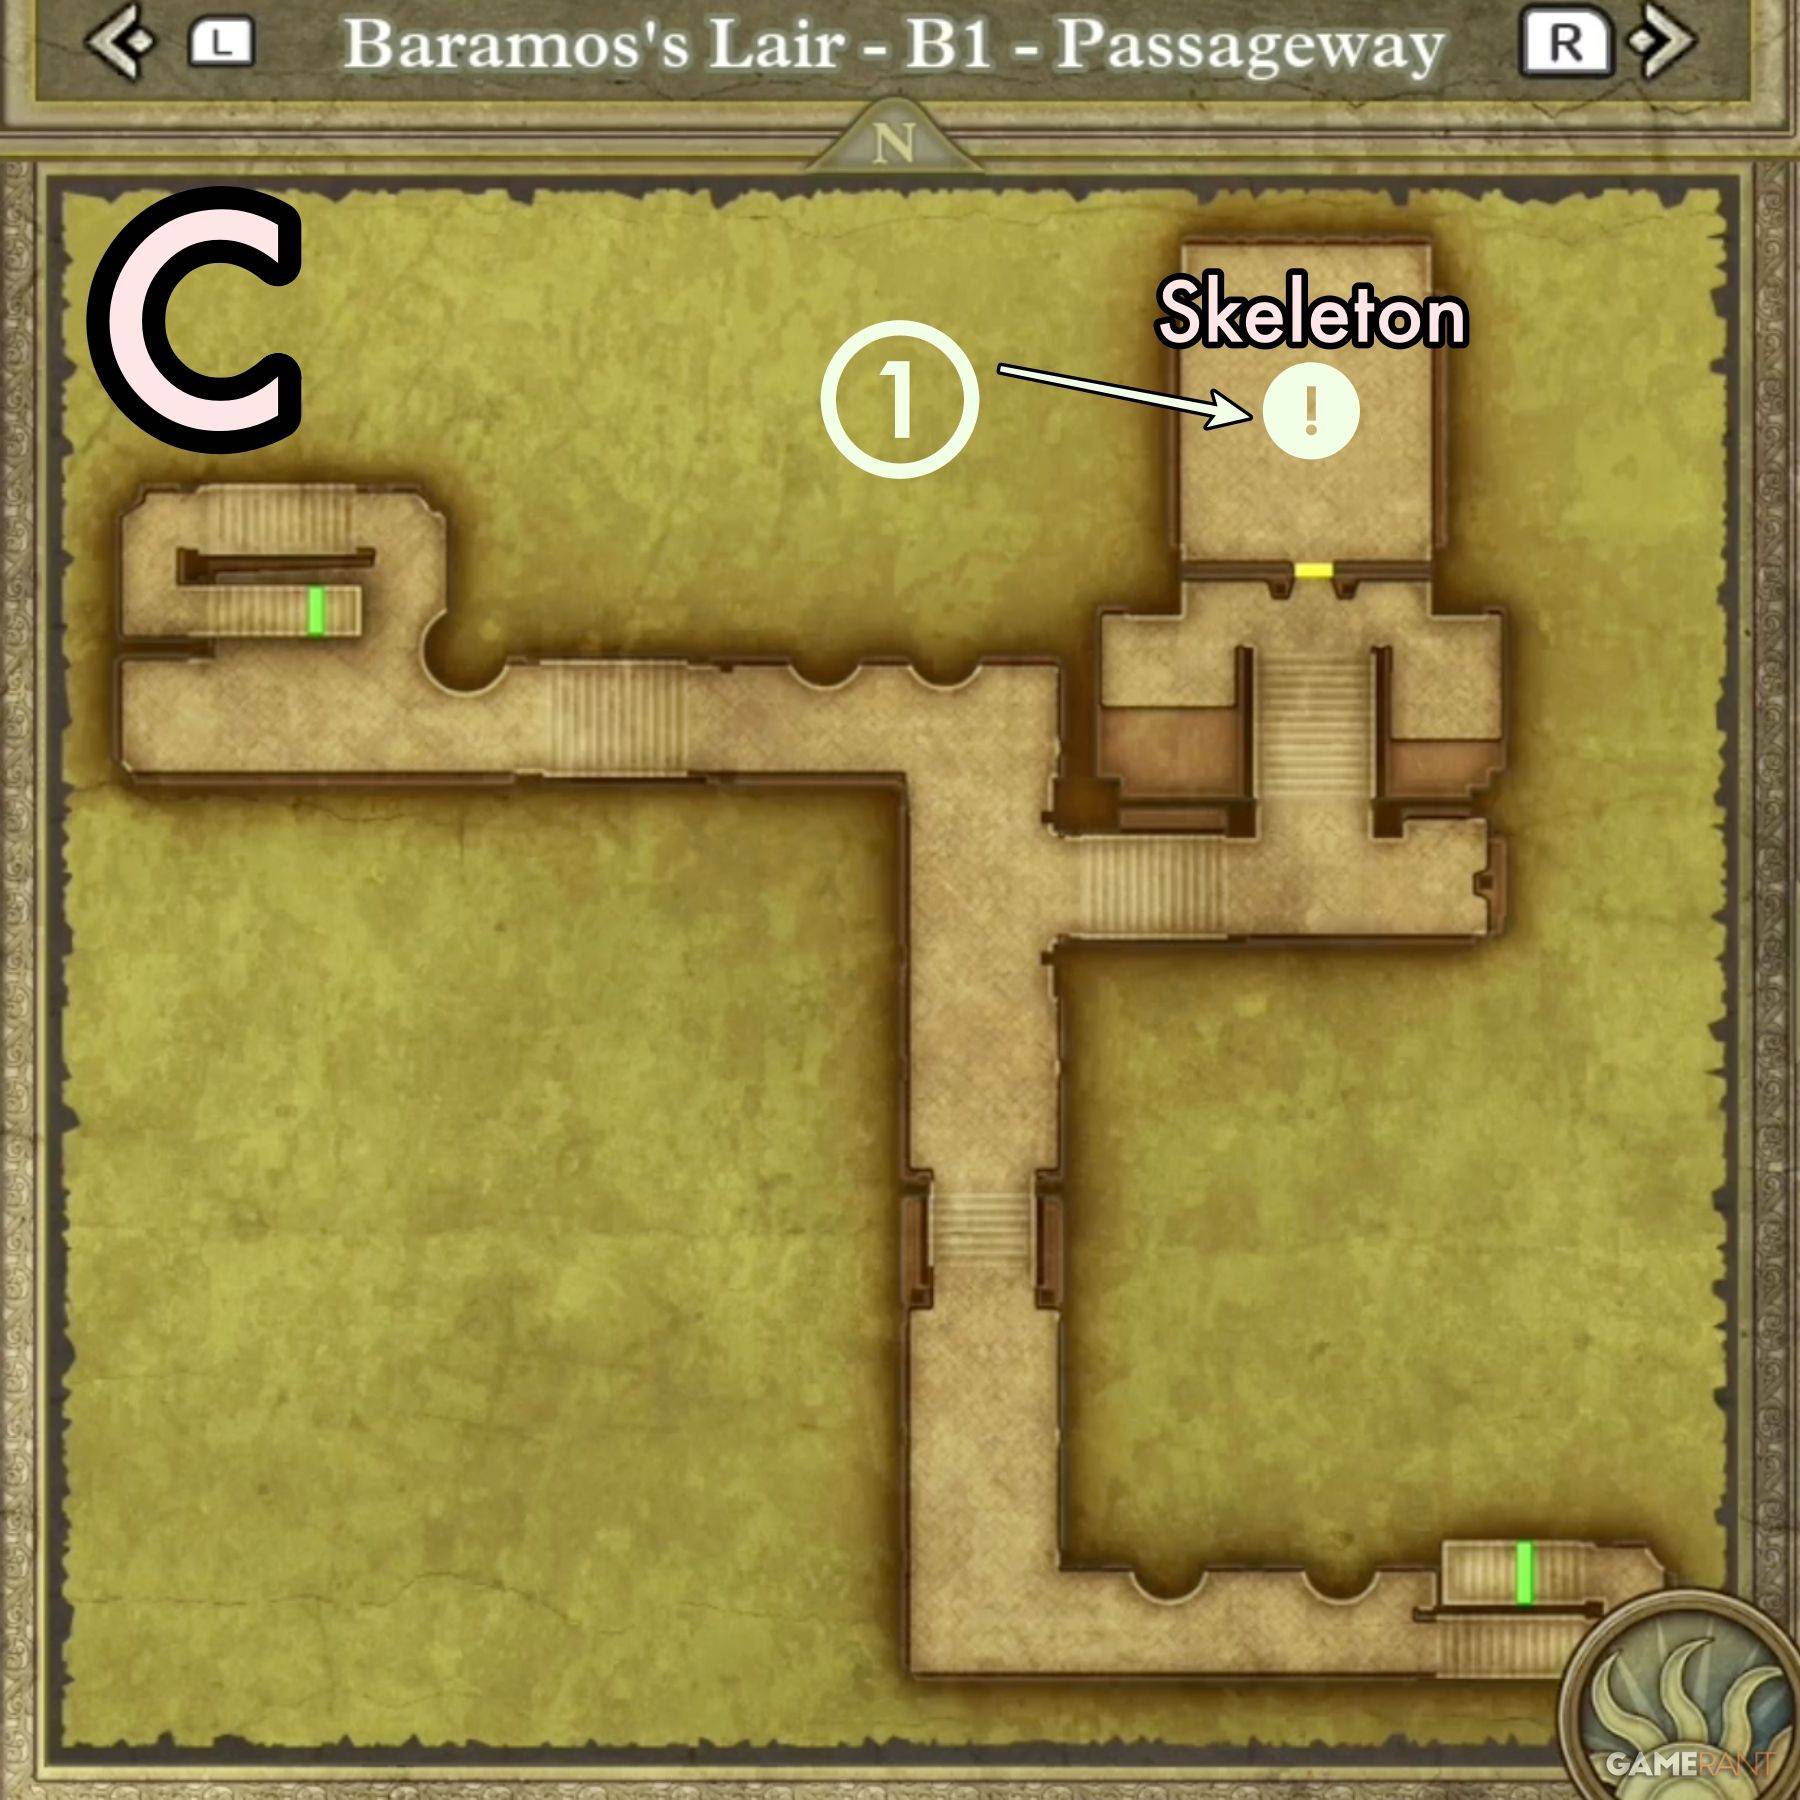 - Treasure 1 (Buried): Mini Medal (On left side of skeleton)
To reach this area, go to the northern section of the Entrance map. Take the western staircase to B1 Passageway C.
All Throne Room Treasure:
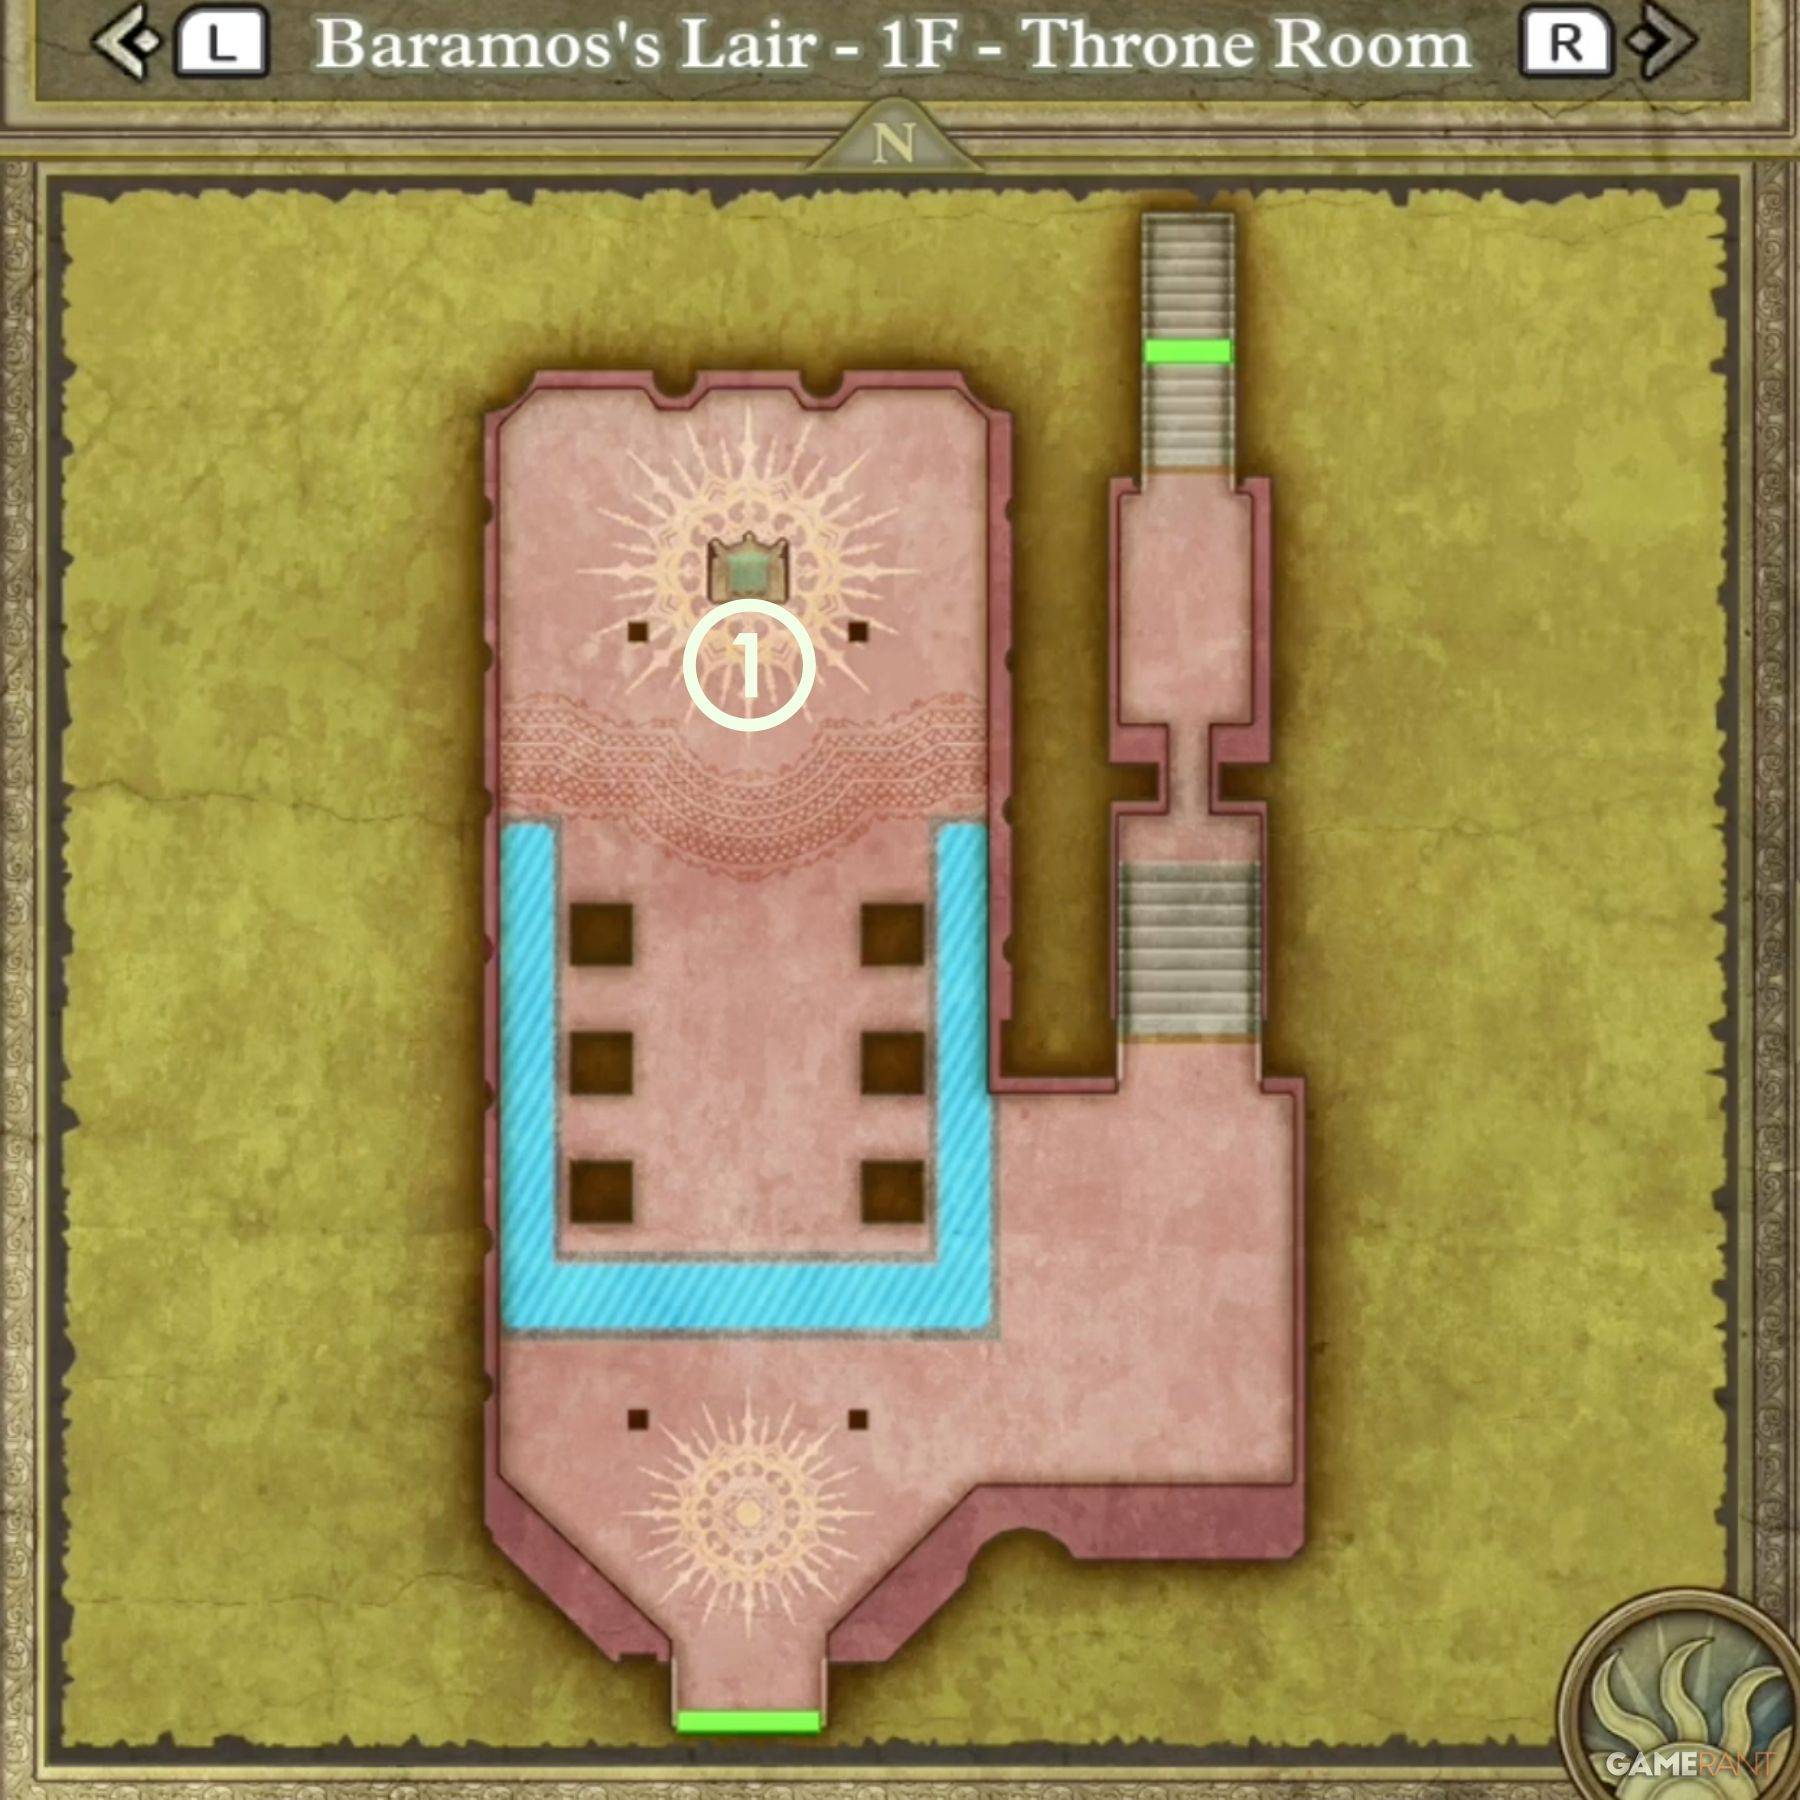 - Treasure 1 (Buried): Mini Medal (in front of throne)
How to Defeat Baramos – Dragon Quest 3 Remake
 Baramos will likely be the toughest opponent you've faced in DQIII Remake. A solid strategy and proper leveling are crucial for victory.
What is Baramos Weak to in Dragon Quest 3 Remake?
Understanding Baramos's weaknesses is key to your strategy. Baramos is vulnerable to:
- Crack (All ice-based spells)
- Woosh (All wind-based spells)
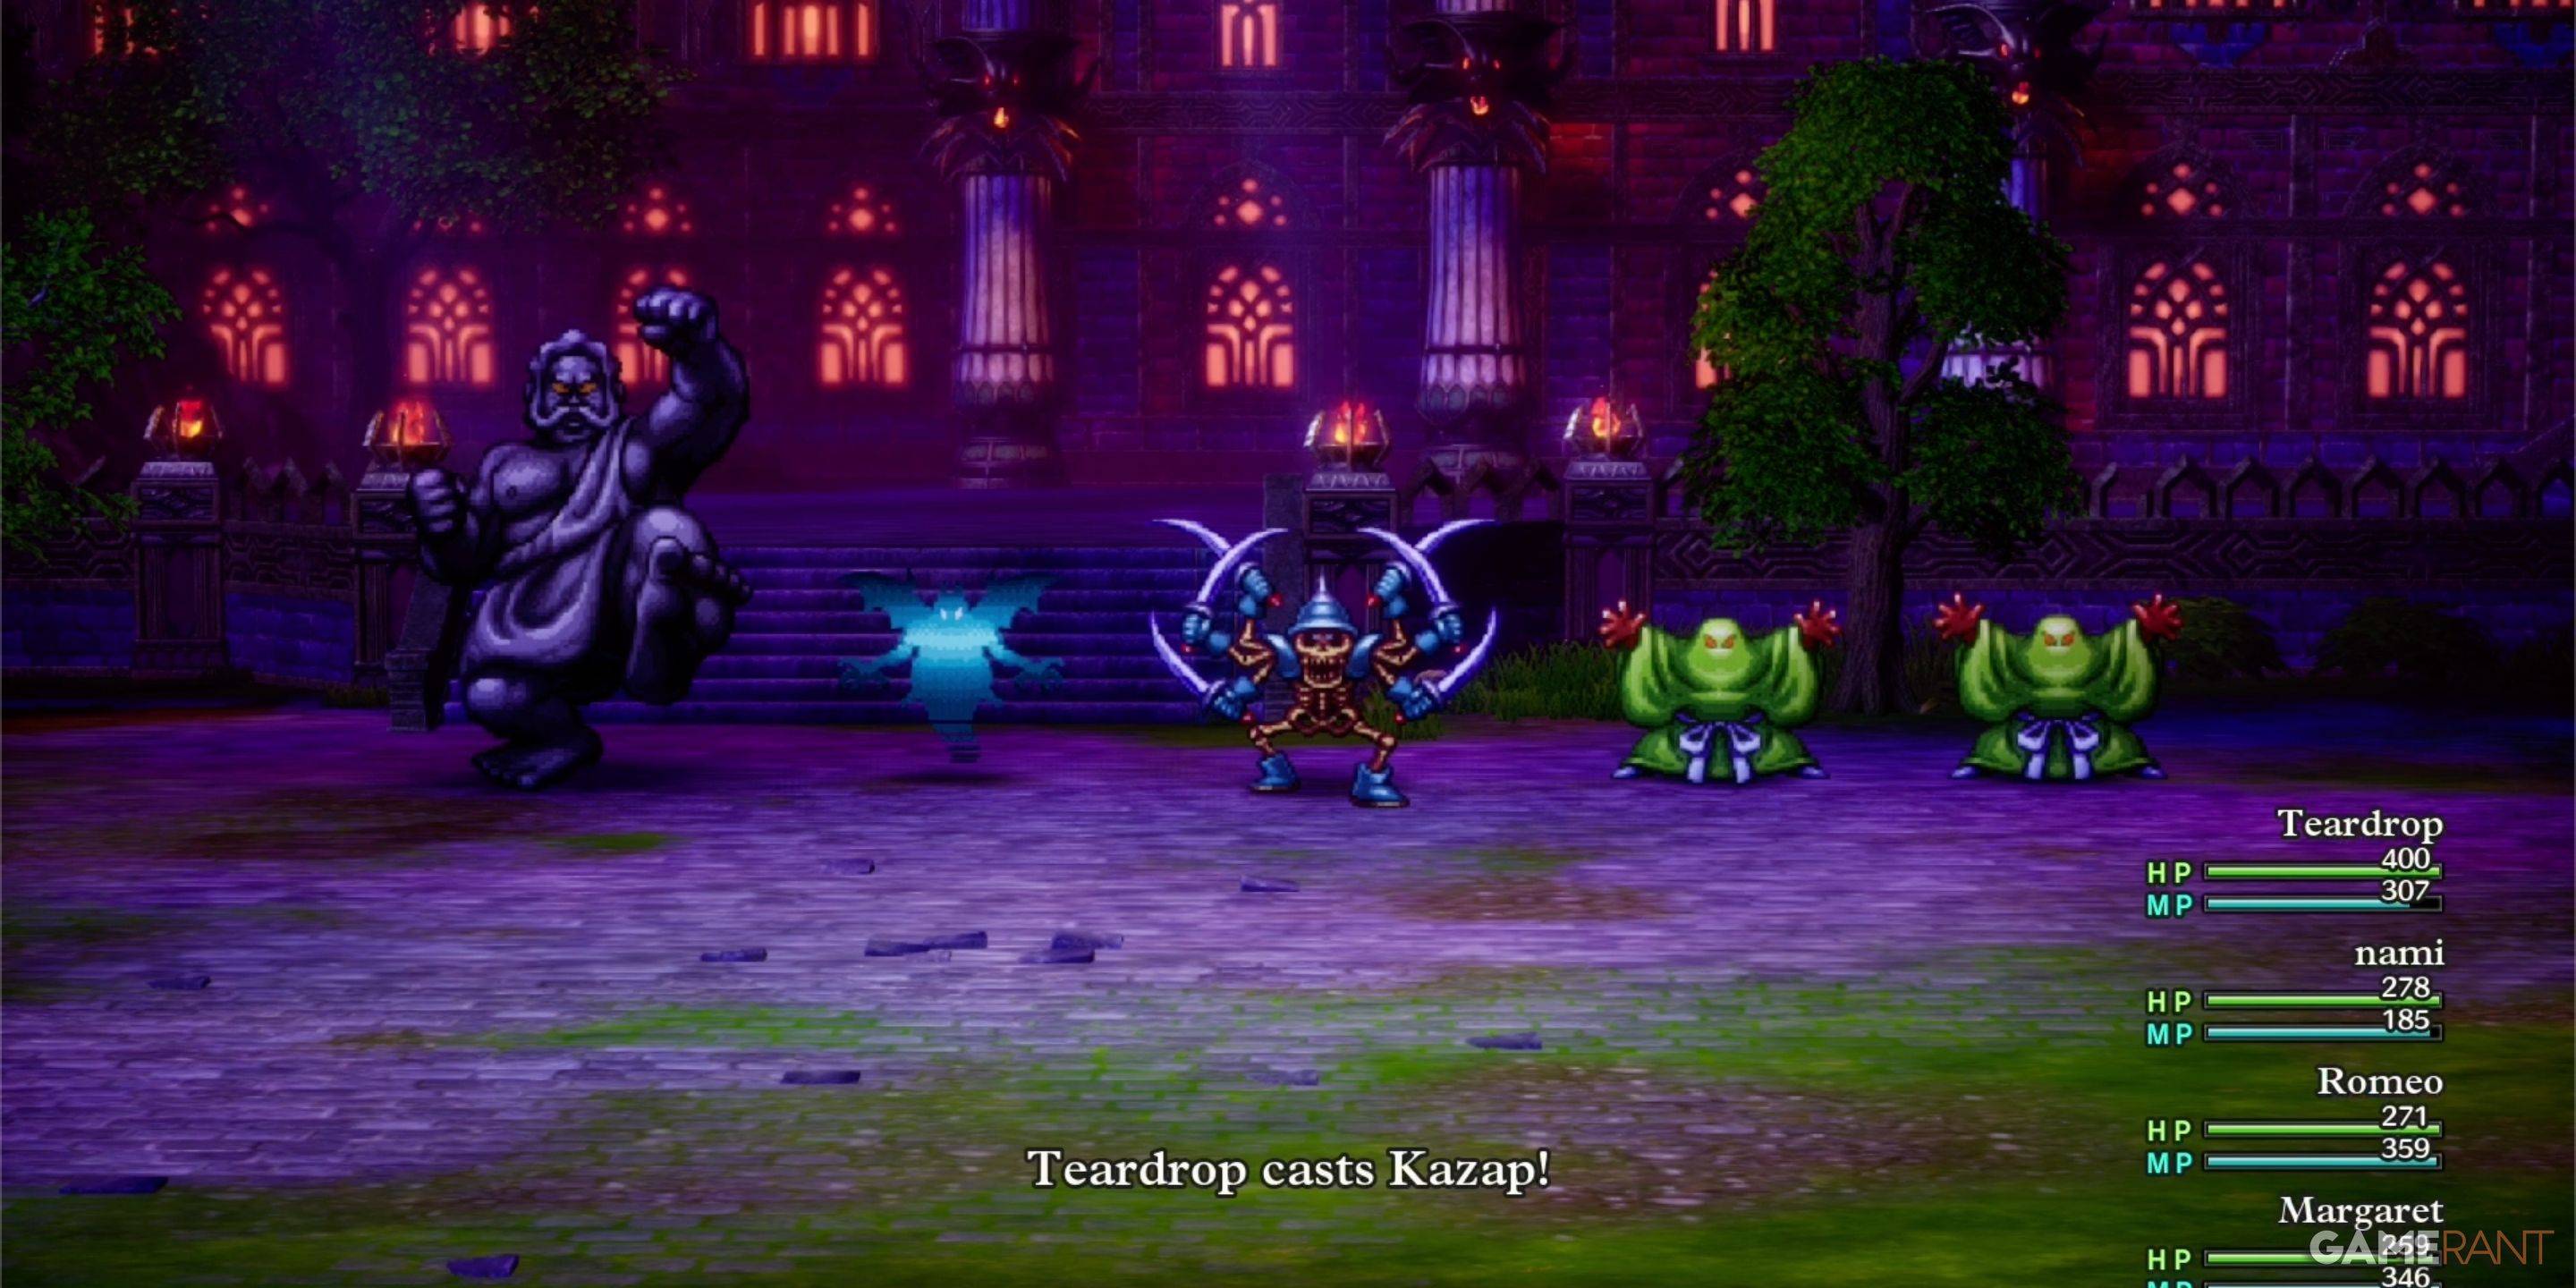
Baramos is not weak to Zap in any form. By this point, you should have access to higher-level spells like Kacrack and Swoosh. Since the Hero can't cast these, consider using them for healing and letting two spell casters focus on offense, or use Gust Slash.
Maintain at least one dedicated healer throughout the fight. Even at the right level, Baramos can swiftly defeat your party. Prioritize healing each round; there's no rush to defeat Baramos quickly. Focus on survival.
Every Monster in Baramos's Lair – Dragon Quest 3 Remake
| Monster Name | Weakness |
|---|---|
| Armful | Zap |
| Boreal Serpent | TBD |
| Infanticore | TBD |
| Leger-De-Man | TBD |
| Living Statue | None |
| Liquid Metal Slime | None |
| Silhouette | Varies (Each is different) |


-
1

Every Pokémon Game on the Nintendo Switch in 2025
Feb 25,2025
-
2
Stardew Valley: A Complete Guide To Enchantments & Weapon Forging
Mar 17,2025
-
3
![Anime Vanguards Tier List – Best Units For Each Gamemode [UPDATE 3.0]](https://images.gzztb.com/uploads/35/17376012656791b0f12fa1c.jpg)
Anime Vanguards Tier List – Best Units For Each Gamemode [UPDATE 3.0]
Feb 27,2025
-
4
Ragnarok X: Next Gen - Complete Enchantment Guide
May 25,2025
-
5

Poring Rush, the casual battling spin-off from hit MMORPG Ragnarok Online, is out now
Dec 30,2024
-
6

Roblox: Trucking Empire Codes (January 2025)
Mar 05,2025
-
7

Nvidia RTX 5090 Specs Leak: Rumor Confirmed?
Mar 14,2025
-
8

How To Read Black Panther Lore: The Blood of Kings in Marvel Rivals
Mar 01,2025
-
9
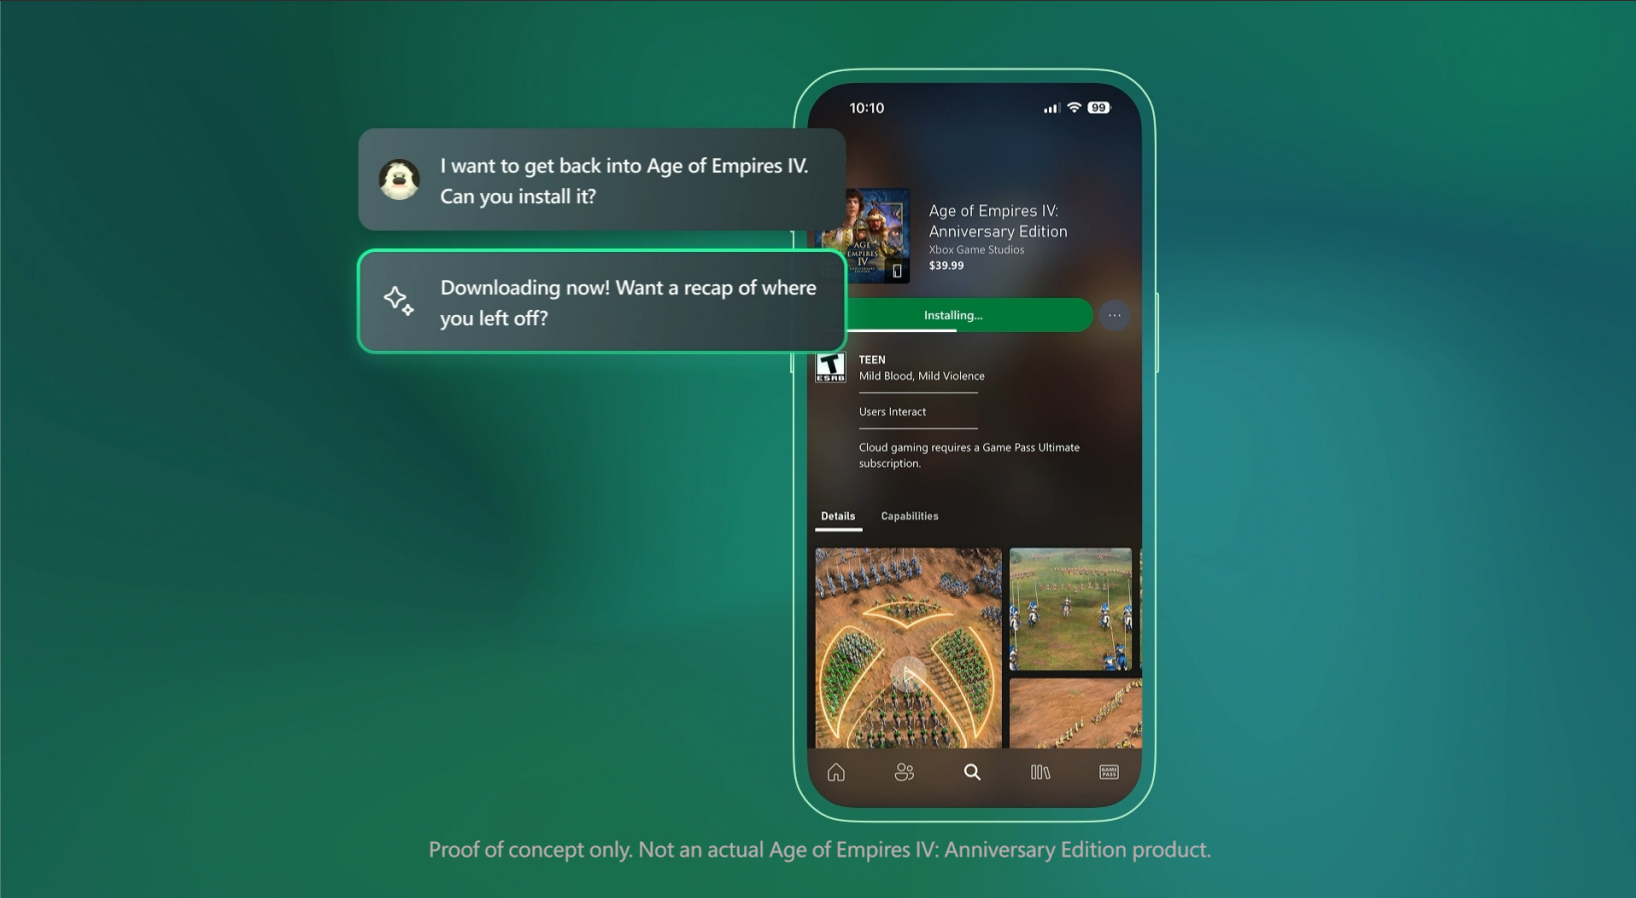
Microsoft to Integrate Copilot AI into Xbox App and Games
May 21,2025
-
10

Hearthstone has kicked off the Year of the Raptor with a myriad of new content
Mar 16,2025
-
Download

The Golden Boy
Casual / 229.00M
Update: Dec 17,2024
-
Download

Niramare Quest
Casual / 626.43M
Update: Feb 21,2023
-
Download

Mother's Lesson : Mitsuko
Role Playing / 716.30M
Update: Dec 14,2024
-
4
POW
-
5
Gamer Struggles
-
6
How To Raise A Happy Neet
-
7
Poly Pantheon Chapter One V 1.2
-
8
Dictator – Rule the World
-
9
Strobe
-
10
Livetopia: Party