Mastering Dual Blades in Monster Hunter Wilds: Moves and Combos Guide
In the dynamic world of *Monster Hunter Wilds*, it's not just brute strength that triumphs. Speed and strategic positioning can be just as crucial, allowing even the swiftest hunters to challenge the mightiest beasts. This is where the Dual Blades shine, offering unparalleled agility and attack speed. Here's how to master these rapid and versatile weapons for maximum effectiveness in your hunts.
Dual Blades in Monster Hunter Wilds
Dual Blades are renowned for their rapid, multi-hit attacks, making them perfect for hunters who thrive on quick, successive strikes. Mastering both their standard and special modes is essential for dominating the battlefield.
All Moves
| Command | Move | Description |
|---|---|---|
| Triangle/Y | Double Slash/Circle Slash | Initiate combat with this basic combo. Press Triangle/Y for a Double Slash, and follow up with another press for a Circle Slash. |
| Circle/B | Lunging Strike/Roundslash | Advance forward with a slashing attack. Press the command again to execute a Roundslash. |
| R2/RT | Demon Mode | Activate Demon Mode to enhance your attack, movement speed, and evasion. Gain immunity to knockbacks in this state. |
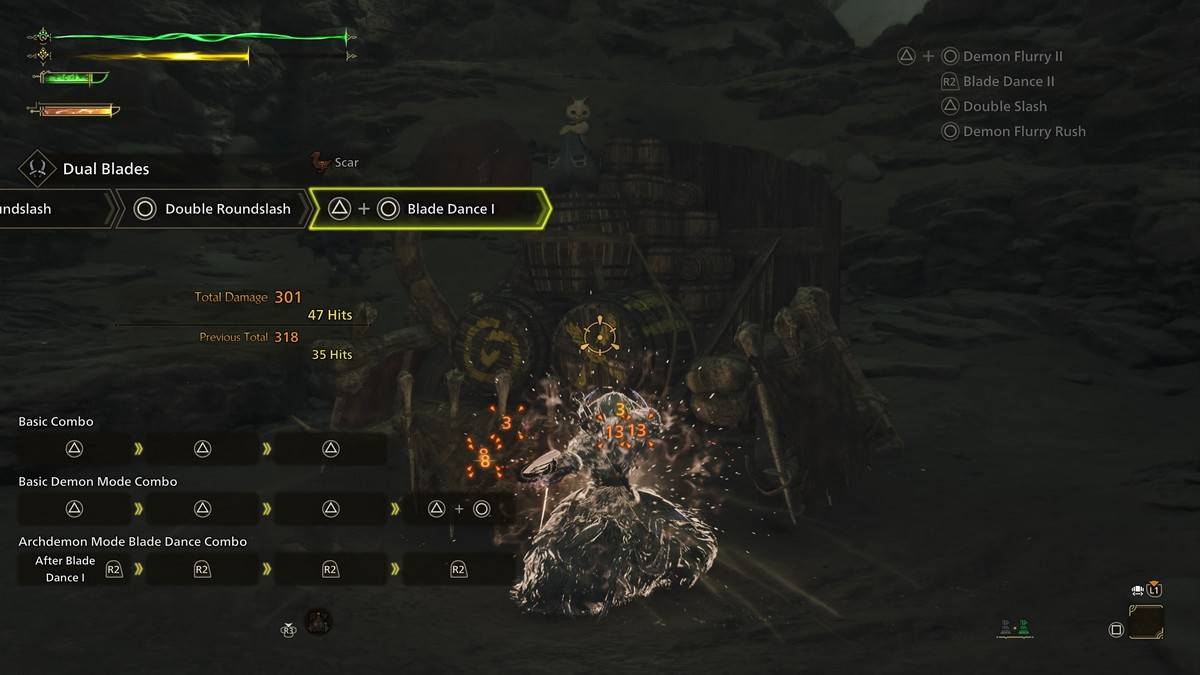
| Triangle/Y + Circle/B (In Demon Mode) | Blade Dance I, II, III | Chain these potent attacks in Demon Mode, consuming the Demon Gauge as you go. |
| Triangle/Y + Circle/B (In Archdemon Mode) | Demon Flurry I, II | Unleash a series of attacks exclusive to Archdemon Mode, using the analog stick to control direction. These moves also consume the Demon Gauge. |
| Cross/A (During Demon/Archdemon Mode) | Demon Dodge | Perform a swift dodge in Demon or Archdemon Mode. A Perfect Evade allows for attacking during the dodge and grants a temporary buff. Demon Dodge does not consume the Demon Gauge in Demon Mode. |
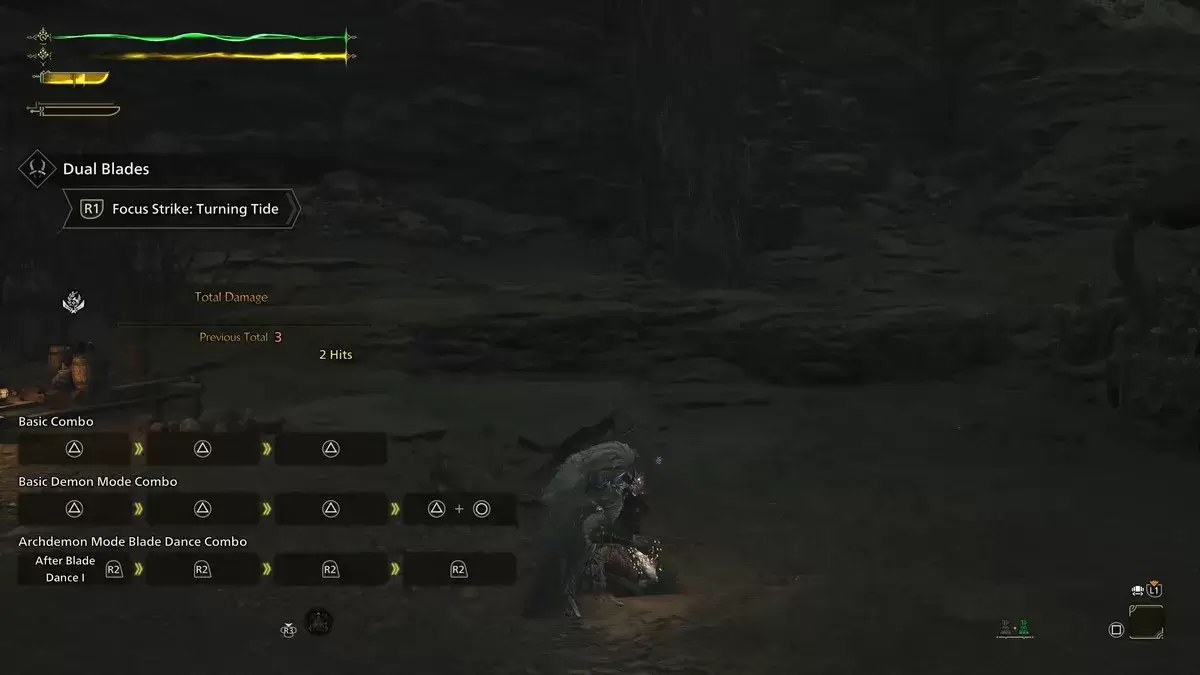
| L2/LT + R1/RB | Focus Strike: Turning Tide | Execute a slashing attack that targets wounds. Hitting a monster's wound triggers a Midair Spinning Blade Dance, capable of destroying multiple wounds across the monster. |
Demon Mode/Demon Gauge and Archdemon Mode
Dual Blades feature a unique Demon Gauge mechanic. Entering Demon Mode enhances your attack, movement speed, and evasion while granting knockback immunity. However, it continuously drains stamina, ending when stamina is depleted or manually canceled. By landing hits in Demon Mode, you fill the Demon Gauge. Once full, you transition to Archdemon Mode, where the gauge depletes over time and is consumed by specific attacks, allowing for boosted strikes. Both modes can be used in tandem, and the Demon Gauge stops decreasing when you mount a monster, giving you strategic flexibility.
Demon Dodge
After executing a Perfect Evade, you enter an enhanced state known as Demon Dodge. This state increases both regular and elemental damage, allowing you to attack while dodging. Demon Dodge provides a 12-second damage buff, and subsequent dodges will deal damage as you spin forward.
Combos
The effectiveness of Dual Blades heavily relies on mastering combos in Demon and Archdemon Modes. Understanding how to chain attacks together will maximize your damage output.
Basic Combo
Start with a simple yet effective combo: three consecutive Triangle/Y attacks for Double Slash, Double Slash Return Stroke, and Circle Slash. This sequence delivers reliable damage in various scenarios. Alternatively, use the Circle/B Demon Flurry Rush – Spinning Slash – Double Roundslash combo to quickly fill your Demon Gauge.
Demon Mode Basic Combo
In Demon Mode, your basic combo becomes more potent and faster. Begin with Demon Fangs, followed by Twofold Demon Slash and Sixfold Demon Slash, then finish with Triangle/Y + Circle/B for Demon Flurry I.
Archdemon Mode Blade Dance Combo
After filling the Demon Gauge, switch to Archdemon Mode for intense, swift attacks. Start with Blade Dance (Triangle/Y + Circle/B) in Demon Mode, then press R2/RT four more times for Demon Flurry I into Blade Dance II, and conclude with Demon Flurry II and Blade Dance III. This seamless transition between modes delivers significant damage rapidly.
Dual Blade Tips
To truly excel with Dual Blades, you must fluidly shift between Demon and Archdemon Modes, maximizing your damage potential.
Always Follow Up
Initiate combat with the basic Demon Flurry Rush combo (Circle/B + Circle/B + Circle/B), then transition into a full Demon or Archdemon Mode combo with three sets of Triangle/Y + Circle/B. This approach fills your Demon Gauge and converts it into swift damage, a tactic unmatched by slower weapons like the Great Sword.
Keep Your Stamina Up
Since Demon Mode relies on your stamina, maintaining a high level is crucial. While you can exit the mode to recover, using Focus Strike on wounds can temporarily halt stamina drain while filling the Demon Gauge, preparing you for more aggressive attacks upon landing.
Dodging in Between Attacks
Without a shield, dodging is your primary defense. Dual Blades offer exceptional mobility, allowing you to dodge out of most attacks and combos. Avoid overcommitting and wait for opportune moments to strike, leveraging the weapons' quick animations.
Ensure Sharpness
The rapid attacks of Dual Blades quickly wear down their sharpness. Incorporate the Speed Sharpening skill into your build to minimize downtime and swiftly return to battle.
Mastering the Dual Blades in *Monster Hunter Wilds* requires understanding their unique mechanics and mastering the art of quick, precise strikes. For more tips and strategies, keep exploring The Escapist.
*Monster Hunter Wilds is available now on PlayStation, Xbox, and PC.*


-
1

Every Pokémon Game on the Nintendo Switch in 2025
Feb 25,2025
-
2

Roblox: Trucking Empire Codes (January 2025)
Mar 05,2025
-
3
![Anime Vanguards Tier List – Best Units For Each Gamemode [UPDATE 3.0]](https://images.gzztb.com/uploads/35/17376012656791b0f12fa1c.jpg)
Anime Vanguards Tier List – Best Units For Each Gamemode [UPDATE 3.0]
Feb 27,2025
-
4

Stardew Valley: A Complete Guide To Enchantments & Weapon Forging
Mar 17,2025
-
5

Poring Rush, the casual battling spin-off from hit MMORPG Ragnarok Online, is out now
Dec 30,2024
-
6
Ragnarok X: Next Gen - Complete Enchantment Guide
May 25,2025
-
7
Nvidia RTX 5090 Specs Leak: Rumor Confirmed?
Mar 14,2025
-
8

How To Read Black Panther Lore: The Blood of Kings in Marvel Rivals
Mar 01,2025
-
9

Microsoft to Integrate Copilot AI into Xbox App and Games
May 21,2025
-
10

Hearthstone has kicked off the Year of the Raptor with a myriad of new content
Mar 16,2025
-
Download

The Golden Boy
Casual / 229.00M
Update: Dec 17,2024
-
Download

Niramare Quest
Casual / 626.43M
Update: Feb 21,2023
-
Download

POW
Casual / 38.00M
Update: Dec 19,2024
-
4
Mother's Lesson : Mitsuko
-
5
Gamer Struggles
-
6
How To Raise A Happy Neet
-
7
Poly Pantheon Chapter One V 1.2
-
8
Dictator – Rule the World
-
9
Strobe
-
10
Livetopia: Party